Thursday, July 19, 2012

Avocado 2 Ways: Creamy Avocado Sauce & Chocolate Avocado Mousse

Jean,

One word can always make my mouth water. That word is AVOCADO!! You will never find my house without avocado in it! You will never find the husband not asking me to make guacamole for him. In fact avocado is so big around here, it was even Mr. P's first baby food!! I happen to have two avocado recipes I've tried out that got some attention on the ole' Instagram, so I decided to share. Creamy Avocado Sauce and Chocolate Avocado Pudding.... Mousse if you're fancy. Let's be fancy!

chocolate avocado pudding

So a few weeks ago when we were chatting, I had come across my new favorite blog That's So Michelle. I mean what's not to love? Her recipes are amazing... AND she has a WHOLE section dedicated to Jello Shots. Oh and she just got married. Congrats Michelle! I had to take some time off from stalking her blog solely to make sure that this blog didn't just become a replica of hers! (I do have one more recipe of her's that I HAVE to post... because it's THAT good, and because the story with it is AMAZING.) Ha. She makes what I wanna make, and she eats what I want to eat. So these are two Michelle based recipes. The Creamy Avocado Sauce is from her site as well as the inspiration for the Chocolate Avocado Mousse.


So let's start with the Creamy Avocado Sauce! It's simple, it's fresh, and it's delish!


Gather up your ingredients: avocado, lemon, garlic, olive oil, flat leaf parsley, salt, pepper, and pasta. I used a locally made Gourmet Texas Pasta from our farmers market. It's a roasted garlic & jalapeño linguine. Yum. Start boiling your water and through your pasta in.


While the pasta is a'cooking, put your olive oil, lemon juice, and garlic cloves in food processor. Blend until smooth. Then add avocado, parsley, and salt. Go easy on the parsley. First time I made this, I put in to much for my taste. You can always add more!


Consistency should be smooth and well, creamy. How did i ever cook/bake/live without a food processor??


Strain cooked pasta, and combine with avocado sauce!


 Top with fresh cracked pepper, and some lemon zest. I also added some grated parmesan cheese because, well, why not!!!

Next is my new favorite decadent guilt free dessert!!! I saw something similar to this on Michelle's blog, then took to my own devices of searching for something that might use dark chocolate (you know, because it's good for you) and maybe a little less calories so I didn't have to feel much guilt indulging since I WILL win the battle against this baby weight. Then here it was on Peanut Butter Fingers  blog. 
I was ready to dive into it's simplicity.  


Three simple ingredients = so much taste! Just put it all in you food processor.... then ENJOY!!


I've been enjoying mine with oven toasted almonds and raspberries. But feel free to decorate yours according to your palate. Or eat it as it. It truly need no enhancement!!
Sorry there aren't more pics of the process, but i just wanted this in my mouth as soon as possible!!


CREAMY AVOCADO PASTA SAUCE
(makes 2 servings)

1/2 a good sized lemon (for juice and zest)
2 tablespoons Olive Oil
2-3 garlic cloves
1 ripe avocado
flat leave parsley (to taste)
1/2 tsp (pinch) salt 
pepper
fresh grated parmesan (optional)

Cook pasta according to box instructions.
In bowl of your food processor, combine juice of half a lemon, olive oil, and garlic cloves until smooth.
Next add in pitted avocado, salt,  and parsley. Remember, a little can go a long ways. 
Process until creamy.
Mix with cooked pasta. Top with pepper and lemon zest, as well as parmesan cheese if desired!


DARK CHOCOLATE AVOCADO MOUSSE
(makes 2 servings)

1 large ripe avocado
3-4 Tbls Hersey's Dark Chocolate Cocoa Powder
3-4 Tbls Honey
1/2 tsp vanilla

Put all ingredients in the food processor for about a minute and enjoy! 
You may need to scrap down the sides a couple of time. 
Top with nothing, or anything! 
(NOTE: I only used the vanilla when I was using an especially strong honey and I wanted to balance out the honey taste.)

Til next time!!
Geneva


Monday, July 9, 2012

Maple-y Bacon-y Brown Sugar-y Scones

My Sweet Jean,

I hope that you had a wonderful birthday weekend running around NYC. While you were off celebrating, I was baking and eating the weekend away with the hubs. Who needs to try to lose baby weight when there are things to bake and eat like Maple Bacon Scones!!!! 

bacon scones

That's right... MAPLE.... BACON.... SCONES!!!!! 
Can you taste through the computer?
I think that mine and Dave's favorite meal has to brunch. So every weekend, or more like Friday night, the conversation of what we will eat for weekend brunch comes up. Well Dave wanted homemade buttermilk biscuits and gravy, and of course, this is a great suggestion. However, I've made that for him, and wanted to make him something new that I hadn't made for him before. So I got on the old trusty internet, typed in what I wanted, and I didn't need to look any further than How Sweet It Is to find EXACTLY what i was looking for!! So here goes:


So you've got a few options as far as the bacon goes. You can use regular bacon and cook it up as you normally would... OR you can make candied bacon. OBVIOUSLY I highly recommend candied bacon. Yes it's an addition step, but it is easy and beyond rewarding. Trust me on this! Before you start, you'll want to line a baking sheet with foil and use a grill rack or cooling rack on top, as pictured above.


Next mix about half a cup brown sugar with a little cinnamon, and coat five to six strips of bacon for the recipe. (You'll also want to coat a few extra just to have as some noshing material!) 
NOTE: using this dish wasn't the best option for coating. After the first piece I transferred the brown sugar mixture to a regular flat plate. But hey, this picture is pretty cute! I love my owl measuring cups! 
After bacon is coated, just pop in the oven at 350º for 15-20 minutes depending on thickness of bacon.


Meanwhile, gather your ingredients!!! 


Mix together all dry ingredients. Flour, brown sugar, baking soda and powder, salt, cinnamon, and nutmeg. Then cube your COLD butter. You want your butter cold, just as you would when making a pie crust. Work butter with your hands til you get a course cornmeal like consistency. Stir in buttermilk and vanilla til coated, then get in there with your hands again. I had to add in a little more buttermilk, like 2 extra TBLS to get it the right stickiness to hold together. 


By now your bacon should be done, and cooled enough to do a nice chop. Up the oven heat to 425º. Oh hey, how are those extra pieces I told you to make up!? You're welcome! 


Fold in bacon. Remove to a floured surface and give a few good kneads.


Separate into two disc and press into about 7 inch diameter circles. Brush with melted butter and sprinkle with either coarse sugar or brown sugar.


Cut each disc into 8ths and place on a foil lined baking sheet.


That's pretty much all there is to it!! Let that deliciousness bake for 12-15 minutes and remove. While it's cooking go ahead and make your maple glaze, which is just confectioners sugar and maple syrup with a splash of vanilla!


Top with glaze... and dig in!!
This recipe makes 16 scones! I should have read ahead before I made it. Feel free to cut in half. There are about 9 Blackhawk pilots and crew chiefs reaping the benefits of my labor today. I made Dave take them to work (like I do with everything I make!) so they aren't here taunting me, and my Jillian Michael's and Pop Physique  workouts stand a better change!!


MAPLE BACON BROWN SUGAR SCONES
makes 16 scones

3 1/4 cups flour
1/3 cup brown sugar
2 1/2 teaspoons baking powder
1/2 teaspoon baking soda
1/2 teaspoon salt
1/2 teaspoon cinnamon
1/4 teaspoon nutmeg
3/4 cups cold butter
1 cup buttermilk (I used 2 more TBLS)
1 teaspoon vanilla
5-6 strips cooked bacon, crumbled
(if you are going to make candied bacon you will need another 1/2 cup of brown sugar and a little cinnamon)
Melted butter and coarse or brown sugar for topping


For candied bacon, preheat oven to 350º
Mix together 1/2 brown sugar and cinnamon to taste. Coat bacon and place on a grilling rack over a foil lined baking sheet.
Bake for 15-20 minutes depending on bacon thickness.

Once bacon is done, let cool a bit and chop into crumbles. 
Turn oven up to 425º for the scones.

 Combine dry ingredients.
 Cut in butter, with hands, until it forms coarse crumbs. 
Stir in buttermilk and vanilla. 
Fold in bacon crumbles. Turn onto a lightly floured surface and knead gently.
Divide in half and pat into 7 inch round circles
Brush with melted butter and sprinkle with coarse sugar. Cut into 6 or 8 wedges.
Bake at 425º for 12-14 minutes. Top with maple glaze.


MAPLE GLAZE

1 1/2 tablespoons maple syrup
1/4 teaspoon vanilla extract
drop of water
1 cup powdered sugar

Combine syrup, vanilla and powdered sugar and stir until combined. 
Based on the consistency of the glaze, add water one drop at a time and stir 
Continue to stir until desired consistency is reached. 


Hope you make these soon!!! ENJOY!!!!

Love ya,
Geneva

Monday, July 2, 2012

Quinoa Fruit Salad with Honey Ginger Dressing

My Dearest Jean,

So here we go with post number two! 
I'm enjoying exposing Dave to new foods, and one of those news foods has been quinoa. I've made it for him a few different ways so far; curried quinoa, quinoa with sweet potatoes, quinoa with black beans, corn and avocado. Since i just got some tricolored quinoa, I wanted to make something to showcase all those colors, as well as something that i hadn't made for him before.


Well whats more colorful than fruit!!!!


So that was that, and I decided on a quinoa fruit salad dressed with a honey, ginger, and lime dressing! Are you drooling yet? For the fruit, you can really pick whatever you want. I used a little of everything we had in the house. Strawberries, peaches, green apples, and blueberries.


While I was dicing, I remembered about the sweet corn that we had just picked up and thought what a wonderful addition this would be!! Now when I say sweet corn, I mean sweet summer corn. The kind that you can eat raw and it tastes like candy! I never knew this awesomeness until about a 9 months ago when my friend Jessica, her baby girl, and I were strolling through the Hillcrest Farmer's Market and one of the farmers there handed us a half an ear of corn and told us to try it. We both looked at each other, and I told her to go first. In my head, all I was imagining was that bitterness of uncooked corn. I was hesitant. But I trust her tastebuds, and she assured me that it was good. I bit in... and my goodness. I was in love. We both bought some and if I remember correctly, both our stashes were gone by the next day. I went back and bought more and would even pack them in Bowie's lunches. He loved them as well. Then a few weeks later, they were gone!! Sweet corn season was over. How cold this be? I'd only just acquired the knowledge of its raw delicious crispness and I was told I'd have to wait til the following May for more. It was a rough year of waiting for sweet corn season again. No, wait, that's not right. It was rough waiting for Dave to get home from deployment. It was torture waiting for sweet corn season. It just so happens both things were happening in May. Ha. I digress. The point of the above tangent, if you don't have access to the type of sweet corn that I am referring to, don't bother. 

Back to the recipe. Prepare your quinoa according to directions. Which are almost always 2 parts water to 1 part quinoa. For today's adventure, I just did half a cup of quinoa since it was just gonna be Dave and I eating it. While the quinoa was cooking, I prepared the dressing.


Simple, but creates quite a complex flavor. Honey, lime, and some fresh grated ginger. Note, the recipe below has my starting measures. I did tinker with it a little bit to get it EXACTLY how I wanted it. Use caution with the ginger, it really brings out the citrus of the lime, so I added more honey as I wanted that to be a forefront tone for the palette as far as the dressing was concerned. 


Oh and if you don't have one of these lime squeezer do-hickeys... get one! Dave brought me it home one day from the store when I was making a key lime pie.


So after the dressing is done, mix it into the quinoa until coated. Then add the fruit in.


Stir.


And, viola. Oh and as if thats not the tasty enough, I got crazy and did THIS:


Added Point Reyes blue cheese on top!! That is a whole lotta flavor explosion right there!!


QUINOA FRUIT SALAD

1/2 Cup quinoa
1 Cup water
1 1/2 Cups strawberries
1 1/2 Peaches
1 Granny smith apple
1/2 An ear of sweet corn raw (see note above)

Boil water (add salt if desired)
Add quinoa. Cover and lower heat. Cook for 10-15 minutes. Until water is absorbed.
Let quinoa cool to room temperature.
In the meantime, cut fruit and prepare dressing.

HONEY GINGER LIME DRESSING

Juice from one lime
3-4 Tbls honey
1/4 tsp freshly grated ginger

Combine. 

Once quinoa cools, add dressing, then add fruit and toss. That's all. 
We had this with some turkey burgers that Dave threw on the grill. Very good!

Oh and you might notice that the recipe only states that I used 1 1/2 peaches. Curious what I did with the other half of the peach?


I gave Mr. P his first taste of sweet sweet peaches! Cuz what kind of southern boy would I be raising if he didn't like peaches?!

Til Next Time,
Geneva


Sunday, July 1, 2012

Ello Lemonie Puppy!!

Hey There Jean!

Things are getting pretty settled around here since Dave's been home. Just been cooking and baking and traveling around while he's got some time off work, and I thought, hey let's make this blog thing happen. So here is my attempt to finish what we started. Errr, rather, START what we started! 

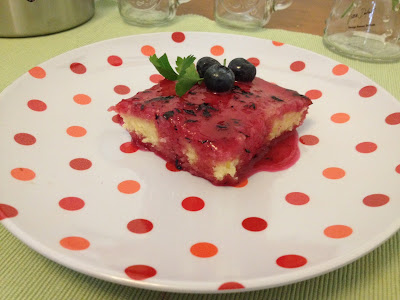
lemon brownie

Summer's been quite a new concept for me now that I'm living in Texas! Summer here means planning your day around being inside and hiding from the triple digit weather. It means starting the car 15 minutes before you wanna leave the house so that the a/c cools the car enough to put the baby in. It means figuring out ways to not feel like a hermit when you look outside and it *looks* inviting and nice but really it just wants to lure you out and suck the sweat from your soul! Ha.

To me, this means cooking like it's summer (a San Diego summer, not a central Texas summer). A summer where friends are picnicking and BBQing. What better summer dessert to bring to these imaginary parties than lemon 'brownies' or Lemonies as Rita's Recipes so dubbed them! I got this recipe from Meriel. She made them awhile back and they looked so delish, plus the hubs enjoys him some lemon flavored treats! So I made, we ate devoured, we fell in love. The taste was more intense than say, a lemon pound cake. And the consistency is definitely more like that of a brownie. In natural me fashion though, I couldn't stick to the entire recipe verbatim. I had to have some part that was ME. Something that I could say was my addition, subtraction, complement, correction, etc. You get the idea. So for this, I swapped out the lemon glaze for a lemon blueberry sauce. It's the little things that make me feel creative. Ha!


The ingredients are as simple as can be: flour, sugar, butter, eggs, a little salt, and of course lemon!!


Mix sugar, flour, and salt with room temperature butter in a medium-large bowl.


Oh hey look.. there's my little sous chef! He's ready to combine the eggs with the lemon juice and zest in a smaller bowl! He really does enjoy watching momma cook and bake.


Then mix mix mix.... are you surprised at all that my hand mixer is orange?


Spread in greased or buttered...mmmm buttered... 8x8 pan, and place in a preheated 350º oven.


Ta-da. These we great. They've got a slightly buttery taste that compliments the lemony goodness! Meriel did give me the warning that a little lemon goes a long way..... so I made sure to adhere to the 1Tbls of lemon juice, and it was perfect! 


Viola! Now then next time I make these, I won't put the sauce on top until serving. It's just not that pretty seeing as it doesn't actually 'glaze' over but rather seeps into the brownies. Not a bad thing, still taste amazing. I just think I'd keep the sauce separate until serving, and then cut and drizzle. Oh and the addition of the fresh blueberries when serving, just made it that much more dynamic.
  

And there you have it!!


LEMONIES
3/4 C flour
3/4 C sugar
1/4 t salt
1/2 cup (one stick) room temperature butter
2 eggs
1 Tbls fresh lemon juice (half of a large lemon)
zest from 1/2 lemon

Preheat oven to 350º
 In the larger of two mixing bowls, mix together flour, sugar, and salt with the room temp butter.
In smaller bowl which the eggs with the lemon juice and lemon zest.
Add lemon-egg mixture to larger bowl and mix until thoroughly combined. 
Pour mixture into a greased or buttered 8x8 brownie or cake pan.
Bake for about 25 minutes.
Let cool completely.

LEMON BLUEBERRY SAUCE
1 Tbls lemon juice (now you've got use for that other half!)
1/2 cup confectioners (powdered) sugar
1/2 Tbls hot water (help break down the powdered sugar)
7-8 fresh blueberries mashed

Add the lemon juice, hot water, and confectioners juice and whisk. When all the sugar has dissolved into the liquids, and in the mashed blueberries.
(i thought about adding cornstarch to thicken the sauce but opted not to... feel free though depending on how your sauce/glaze turns out)

I hope you enjoy making, but mostly eating these. and I sincerely hope that you have a better time beating New York heat than I have hiding from the Texas sun!!

Cheers,
Geneva